
Unveiling the Glow: A Before & After Look at Gram Flour Skin Brightening
Gram flour, also known as besan, has been a beauty secret passed down through generations in South Asia. Its natural properties make it a popular ingredient for skin brightening, offering a gentler alternative to harsh chemical treatments. But what does this process actually look like? Let's delve into a detailed comparison of before-and-after results to understand the potential benefits and limitations of using gram flour for skin brightening.

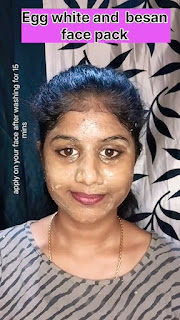
Understanding the "Before"
The "before" picture in a gram flour skin brightening journey depends entirely on the individual. Some might have minor blemishes, uneven skin tone, or sun damage. Others may experience more significant hyperpigmentation or acne scars. It's crucial to set realistic expectations. Gram flour isn't a miracle cure; it works gradually and subtly. Before embarking on this natural remedy, consider taking clear, well-lit photographs of your skin, focusing on areas you wish to improve. Pay attention to:
- Overall skin tone: Note any inconsistencies or dullness.
- Presence of blemishes: Document acne, pimples, or dark spots.
- Texture: Assess roughness, dryness, or oiliness.
These detailed observations will provide a valuable baseline for comparison later on. Remember to cleanse your face thoroughly before taking your "before" pictures for accurate representation.
The Gram Flour Treatment Process
Preparing the Gram Flour Paste
Creating an effective gram flour paste is simple. Typically, you mix gram flour with water, milk (for added moisturizing benefits), or yogurt (for exfoliation and calming properties). You can also add other natural ingredients like turmeric (for anti-inflammatory action) or lemon juice (for its brightening properties). The consistency should be smooth and easily spreadable, like a thick paste. Experiment with different ratios to find what works best for your skin type.
Applying and Removing the Paste
Apply the paste evenly to your cleansed face, avoiding the eye area. Let it dry completely â€" this usually takes 15-20 minutes. Once dry, gently massage the paste in circular motions to exfoliate dead skin cells. Then, rinse thoroughly with lukewarm water and pat your skin dry with a soft towel. Consistency is key; aim for at least 2-3 applications per week for noticeable results.
Analyzing the "After"
The "after" picture, ideally taken after several weeks or months of consistent use, should reveal subtle yet significant improvements. You won't see dramatic overnight changes. Instead, expect a gradual brightening of the skin tone, a reduction in the appearance of blemishes, and a smoother, more even texture. The degree of improvement varies depending on factors such as skin type, consistency of application, and the severity of the initial skin concerns. Compare your "after" photos to your "before" photos, paying close attention to:
- Improved skin tone: Look for a more even and radiant complexion.
- Faded blemishes: Observe any reduction in the size or darkness of spots and acne scars.
- Enhanced texture: Note whether the skin feels smoother and softer.
Remember, while gram flour can significantly improve skin clarity, it's not a substitute for professional dermatological treatments for severe skin conditions. If you have persistent skin issues, consult a dermatologist for appropriate guidance.
Conclusion
Gram flour offers a natural and affordable way to brighten the skin, but understanding the realistic expectations is crucial. The before-and-after comparison, meticulously documented through photographs and observations, serves as a testament to the gradual yet effective nature of this ancient beauty secret. Embrace the journey, be patient, and celebrate the subtle glow that gram flour can help you unveil.
0 comments:
Post a Comment
Note: Only a member of this blog may post a comment.