Quick and effective skin whitening methods at home

Friday, January 31, 2025

Unlock Your Radiance: Quick & Effective Home Skin Whitening Methods

Hey everyone! So, you're looking for ways to brighten your skin tone naturally from the comfort of your own home? You've come to the right place! Let's be clear: "whitening" can be a loaded term, and we're focusing on achieving a more even, radiant complexion, reducing hyperpigmentation, and generally brightening your skin's natural tone. We're *not* talking about drastic changes or unnatural bleaching. Okay, let's dive in!

Understanding Your Skin

Before we jump into specific methods, it's super important to understand your skin type. Are you oily, dry, combination, or sensitive? Knowing this will help you choose the right ingredients and methods that won't irritate your skin. For example, some ingredients that work wonders for oily skin might be too harsh for sensitive skin. Always do a patch test on a small area of skin before applying anything new to your entire face!

Also, consider what's causing your uneven skin tone. Sun damage, hormonal changes, acne scars, and even genetics can all play a role. Addressing the root cause can be just as important as treating the symptoms. If you're dealing with persistent hyperpigmentation or other skin concerns, consider consulting a dermatologist. They can help you develop a tailored skincare routine and rule out any underlying medical conditions.

Natural Ingredients for Brighter Skin

Nature's got some amazing skin-brightening ingredients right at our fingertips! Here are a few favorites:

Lemon Juice: The Classic Brightener

Lemon juice is a popular choice for its citric acid, which can help exfoliate and brighten the skin. However, it's also quite acidic, so use it sparingly and dilute it with water before applying. Never apply undiluted lemon juice directly to your skin, as it can cause irritation and even burning. A good ratio is 1 part lemon juice to 2 parts water. Apply it to your face, leave it on for a few minutes, and then rinse thoroughly. Remember to follow up with a moisturizer!

Yogurt: The Soothing Soother

Yogurt, particularly plain yogurt, is packed with lactic acid, a gentle alpha-hydroxy acid (AHA) that can help exfoliate dead skin cells and even out skin tone. It's also known for its soothing properties, making it a great option for sensitive skin. Simply apply a thin layer of plain yogurt to your face, leave it on for 15-20 minutes, and then rinse with cool water.

Turmeric: The Golden Glow Getter

Turmeric is a powerful anti-inflammatory and antioxidant, and it has been used for centuries to brighten skin. Mix a teaspoon of turmeric powder with a little milk or honey to create a paste. Apply it to your face, leave it on for 10-15 minutes, and then rinse thoroughly. Be careful, as turmeric can stain, so it's best to test it on a small area first.

Aloe Vera: The Soothing Superstar

Aloe vera is a miracle worker for many skin concerns, including hyperpigmentation. Its soothing and healing properties help reduce inflammation and promote skin regeneration. You can apply fresh aloe vera gel directly from the plant or use a store-bought aloe vera gel. Let it sit on your skin for about 15-20 minutes, then rinse it off.

Effective Home Remedies

Now let's combine these natural ingredients into some easy-to-follow home remedies:

Honey-Yogurt Mask:

Mix 2 tablespoons of plain yogurt with 1 tablespoon of honey. Apply the mixture to your face, leave it on for 15-20 minutes, and then rinse with lukewarm water. This mask is gentle yet effective for brightening and hydrating your skin.

Lemon-Honey Scrub:

Combine 1 tablespoon of diluted lemon juice (as described above) with 1 tablespoon of honey and a pinch of sugar. Gently massage this scrub onto your face in circular motions for a minute or two. This helps exfoliate and brighten the skin. Remember to be gentle!

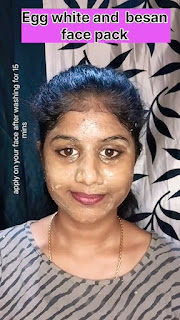
Turmeric-Gram Flour Paste:

Mix 1 tablespoon of turmeric powder with 2 tablespoons of gram flour (also known as besan) and a little water to create a paste. Apply this paste to your face, let it dry completely, and then gently wash it off. This paste is known for its brightening and clarifying effects. This is particularly helpful for oily skin.

Lifestyle Changes for Radiant Skin

Besides topical treatments, lifestyle changes play a significant role in achieving a brighter complexion.

  • Drink plenty of water: Hydration is key for healthy, radiant skin.
  • Eat a balanced diet: Focus on fruits, vegetables, and whole grains.
  • Get enough sleep: Sleep deprivation can lead to dull, tired-looking skin.
  • Protect your skin from the sun: Always use sunscreen with an SPF of 30 or higher, even on cloudy days. This is arguably the most important step!
  • Manage stress: Stress can contribute to skin problems. Find healthy ways to manage stress, such as exercise, yoga, or meditation.
  • Consistency is Key!

    Remember, achieving brighter skin is a journey, not a race. Consistency is key! You won't see results overnight, but with regular use of these home remedies and a healthy lifestyle, you'll notice a gradual improvement in your skin's tone and radiance over time. Be patient and kind to your skin, and you'll see amazing results.

    Commonly Asked Questions

    Q: How often should I use these remedies?

    A: It depends on your skin type and the specific remedy. Start with using them 1-2 times a week and adjust the frequency based on your skin's reaction. If you experience any irritation, reduce the frequency or stop using the remedy altogether.

    Q: Will these methods work for everyone?

    A: While these methods are generally safe and effective, individual results may vary. Factors like skin type, underlying skin conditions, and the severity of hyperpigmentation can affect the outcome.

    Q: What if I have sensitive skin?

    A: If you have sensitive skin, always do a patch test before applying any new product or remedy to your entire face. Start with a diluted version and use it less frequently. Opt for gentler remedies like the yogurt mask or aloe vera gel.

    Q: How long will it take to see results?

    A: You may start noticing a difference in your skin tone within a few weeks of consistent use, but significant improvements may take several months. Be patient and consistent!

    Q: Should I consult a dermatologist?

    A: If you have persistent hyperpigmentation, severe acne scars, or other skin concerns, it's always a good idea to consult a dermatologist. They can provide personalized advice and treatment options.

    Remember to always listen to your skin and adjust your routine accordingly! Good luck on your journey to brighter, more radiant skin!
    Read More..

    Rice water recipes for skin whitening at home

    Tuesday, January 28, 2025

    Harnessing the Power of Rice Water: A Comprehensive Guide to Homemade Skin Whitening Recipes

    For centuries, rice water has been lauded for its cosmetic benefits, particularly its purported ability to lighten and brighten the skin. This traditional remedy, originating in various Asian cultures, is believed to impart a radiant complexion through its unique composition of vitamins, minerals, and antioxidants. While scientific evidence supporting its profound "whitening" effects is still limited and largely anecdotal, many individuals report positive results in terms of improved skin tone and texture. This article provides a detailed exploration of various rice water recipes suitable for home use, focusing on the methods of preparation and application for optimal effectiveness.

    Understanding the Potential Benefits of Rice Water for Skin

    The purported skin-lightening properties of rice water are attributed to its rich content of several key components:

    Inositol: A Key Player in Skin Health

    Inositol, a carbohydrate found abundantly in rice water, plays a crucial role in cell regeneration and turnover. By promoting the growth of new skin cells, it may contribute to a more even-toned and brighter complexion. This increased cell turnover can help to fade hyperpigmentation and improve skin clarity, contributing to the perceived whitening effect.

    Antioxidants: Combating Free Radical Damage

    Rice water contains various antioxidants, including ferulic acid and allantoin. These compounds combat free radical damage, which is a major contributor to premature aging and skin discoloration. By neutralizing free radicals, rice water may help to protect the skin from environmental stressors and prevent the formation of dark spots and blemishes, thus indirectly contributing to a brighter appearance.

    Minerals: Essential Nutrients for Radiant Skin

    Rice water is a good source of several essential minerals, such as selenium and zinc, which play vital roles in maintaining healthy skin. These minerals contribute to the overall health and vitality of the skin, making it appear more radiant and less prone to imperfections. A healthy, well-nourished skin naturally reflects light more effectively, enhancing its luminosity.

    Amino Acids: Building Blocks for Skin Proteins

    Amino acids are the building blocks of proteins, which are essential components of the skin's structure. Rice water contains several amino acids that may contribute to improved skin elasticity and firmness. Healthier skin is more resilient and less likely to suffer from damage that can lead to uneven skin tone.

    Crafting Effective Rice Water Recipes for Skin Whitening

    The preparation of rice water is surprisingly simple. However, different methods yield slightly different results in terms of concentration and the types of beneficial compounds retained. The following recipes detail various techniques for maximizing the effectiveness of rice water for skin whitening:

    The Traditional Fermented Rice Water Method

    This method involves a fermentation process that is believed to enhance the concentration of beneficial compounds.

    1. Rinse the rice: Rinse 1/2 cup of uncooked rice thoroughly under cold running water until the water runs clear.
    2. Soak the rice: Soak the rinsed rice in 2 cups of filtered water for 30 minutes.
    3. Drain and ferment: Drain the rice and store the rice water in a clean glass jar at room temperature. Allow it to ferment for 24-48 hours, or until a slightly sour smell develops. This fermentation process boosts the concentration of beneficial compounds.
    4. Strain and store: Strain the fermented rice water through a fine-mesh sieve or cheesecloth to remove any residual rice particles. Store the strained rice water in a sealed container in the refrigerator for up to a week.

    This fermented rice water is particularly rich in antioxidants and beneficial acids.

    The Quick and Easy Rice Water Method

    This method provides a simpler and faster way to prepare rice water.

    1. Rinse the rice: Rinse 1/4 cup of uncooked rice thoroughly under cold running water.
    2. Boil the rice: Boil the rice in 1 cup of filtered water for 15-20 minutes. The longer the boiling time, the higher the concentration of beneficial compounds, but be careful not to overcook and burn the rice.
    3. Cool and strain: Allow the rice water to cool completely. Strain the water through a fine-mesh sieve or cheesecloth to remove the rice grains.
    4. Store: Store the rice water in a sealed container in the refrigerator for up to 3 days.

    This method is suitable for immediate use and provides a less potent, but still effective solution.

    The First-Water Rice Water Method

    This method utilizes only the first water used to rinse the rice. This water is considered to contain the highest concentration of nutrients.

    1. Rinse the rice: Rinse 1/2 cup of uncooked rice under cold running water. Collect the first water that runs off â€" this is your rice water. Discard the rice after rinsing, do not proceed to cook it.
    2. Strain: You might want to strain the water through a fine-mesh sieve or cheesecloth to remove any residual starch for smoother application
    3. Store: Store the rice water in a sealed container in the refrigerator for up to 3 days.

    This method is excellent for sensitive skin due to its milder nature. Note that the quantity of water will be less than in other methods.

    Application Techniques for Optimal Results

    The application method can also impact the effectiveness of rice water for skin whitening. Here are some recommended approaches:

    Direct Application

    Simply apply the rice water directly to your cleansed face and neck using a cotton ball or clean hands. Allow it to air dry completely. You can repeat this process twice daily, in the morning and evening.

    Rice Water Toner

    Pour the rice water into a clean spray bottle and use it as a facial toner after cleansing. This method is ideal for refreshing and hydrating the skin throughout the day.

    Rice Water Mask

    Soak a cotton face mask or a clean soft cloth in rice water and apply it to your face for 15-20 minutes. This allows for deeper penetration of the beneficial compounds into the skin.

    Rice Water and Other Ingredients

    Combine rice water with other beneficial ingredients like honey, aloe vera, or yogurt to enhance its effectiveness. Honey adds moisture and antimicrobial properties, aloe vera soothes and heals, and yogurt provides lactic acid for gentle exfoliation. Experiment to find the perfect combination that suits your skin type.

    Important Considerations

    While rice water is generally considered safe for topical use, certain precautions should be observed:

    • Patch test: Before applying rice water to your entire face, perform a patch test on a small area of skin to rule out any potential allergic reactions.
    • Consistency: For noticeable results, consistent application is crucial. Regular use is key to seeing improvements in skin tone and texture.
    • Sun protection: While rice water may help to brighten the skin, it does not provide sun protection. Always apply a broad-spectrum sunscreen with an SPF of 30 or higher when spending time outdoors.
    • Individual results: The effectiveness of rice water can vary from person to person. It is crucial to be patient and persistent in its use.
    • Consult a dermatologist: If you have any underlying skin conditions or concerns, consult a dermatologist before using rice water as a skin whitening treatment.

    In conclusion, rice water offers a natural and readily available approach to improving skin tone and texture. While its "whitening" effects are not definitively proven scientifically, its rich composition of beneficial compounds makes it a worthwhile addition to any skincare regimen. Remember to choose the method best suited to your needs and preferences and always prioritize consistent application and sun protection for optimal results.

    Read More..

    How skin brightening with gram flour looks: before and after

    Unveiling the Glow: A Before & After Look at Gram Flour Skin Brightening

    Gram flour, also known as besan, has been a beauty secret passed down through generations in South Asia. Its natural properties make it a popular ingredient for skin brightening, offering a gentler alternative to harsh chemical treatments. But what does this process actually look like? Let's delve into a detailed comparison of before-and-after results to understand the potential benefits and limitations of using gram flour for skin brightening.

    Understanding the "Before"

    The "before" picture in a gram flour skin brightening journey depends entirely on the individual. Some might have minor blemishes, uneven skin tone, or sun damage. Others may experience more significant hyperpigmentation or acne scars. It's crucial to set realistic expectations. Gram flour isn't a miracle cure; it works gradually and subtly. Before embarking on this natural remedy, consider taking clear, well-lit photographs of your skin, focusing on areas you wish to improve. Pay attention to:

    • Overall skin tone: Note any inconsistencies or dullness.
    • Presence of blemishes: Document acne, pimples, or dark spots.
    • Texture: Assess roughness, dryness, or oiliness.

    These detailed observations will provide a valuable baseline for comparison later on. Remember to cleanse your face thoroughly before taking your "before" pictures for accurate representation.

    The Gram Flour Treatment Process

    Preparing the Gram Flour Paste

    Creating an effective gram flour paste is simple. Typically, you mix gram flour with water, milk (for added moisturizing benefits), or yogurt (for exfoliation and calming properties). You can also add other natural ingredients like turmeric (for anti-inflammatory action) or lemon juice (for its brightening properties). The consistency should be smooth and easily spreadable, like a thick paste. Experiment with different ratios to find what works best for your skin type.

    Applying and Removing the Paste

    Apply the paste evenly to your cleansed face, avoiding the eye area. Let it dry completely â€" this usually takes 15-20 minutes. Once dry, gently massage the paste in circular motions to exfoliate dead skin cells. Then, rinse thoroughly with lukewarm water and pat your skin dry with a soft towel. Consistency is key; aim for at least 2-3 applications per week for noticeable results.

    Analyzing the "After"

    The "after" picture, ideally taken after several weeks or months of consistent use, should reveal subtle yet significant improvements. You won't see dramatic overnight changes. Instead, expect a gradual brightening of the skin tone, a reduction in the appearance of blemishes, and a smoother, more even texture. The degree of improvement varies depending on factors such as skin type, consistency of application, and the severity of the initial skin concerns. Compare your "after" photos to your "before" photos, paying close attention to:

    • Improved skin tone: Look for a more even and radiant complexion.
    • Faded blemishes: Observe any reduction in the size or darkness of spots and acne scars.
    • Enhanced texture: Note whether the skin feels smoother and softer.

    Remember, while gram flour can significantly improve skin clarity, it's not a substitute for professional dermatological treatments for severe skin conditions. If you have persistent skin issues, consult a dermatologist for appropriate guidance.

    Conclusion

    Gram flour offers a natural and affordable way to brighten the skin, but understanding the realistic expectations is crucial. The before-and-after comparison, meticulously documented through photographs and observations, serves as a testament to the gradual yet effective nature of this ancient beauty secret. Embrace the journey, be patient, and celebrate the subtle glow that gram flour can help you unveil.

    Read More..

    Skin whitening treatments at home for teenagers

    Unlock Your Radiance: Safe & Effective Home Skin Whitening Treatments for Teens

    Hey there, future glow-getters! So, you're looking for ways to brighten your skin tone and maybe even out your complexion. That's totally understandable â€" we all want to feel confident and comfortable in our skin. But before we dive into some awesome home remedies, let's get one thing straight: drastically changing your skin tone isn't the goal here. We're focusing on achieving a more even, radiant complexion, minimizing blemishes, and promoting healthy, happy skin. Think "glow-up," not "drastic makeover."

    Understanding Your Skin: The First Step to a Brighter You

    Before we even *think* about applying anything to your face, it's crucial to understand your skin type. Are you oily, dry, combination, or sensitive? Knowing this helps you choose the right products and methods to avoid irritation or breakouts. If you're unsure, a quick online quiz or even a chat with a dermatologist can help you figure it out.

    Also, let's talk about sun protection. This isn't just some random tip; it's the *foundation* of any good skincare routine. Sun exposure is a major contributor to uneven skin tone and premature aging. Always use a broad-spectrum sunscreen with an SPF of 30 or higher, even on cloudy days. Reapply every two hours, especially if you're swimming or sweating.

    Natural Wonders: Home Remedies for Brighter Skin

    Now for the fun part â€" exploring the power of natural ingredients! Remember, these are gentle approaches, and consistency is key. Don't expect miracles overnight; healthy skin takes time and patience.

    The Power of Lemon (with Caution!):

    Lemon juice has natural bleaching properties, but use it very sparingly and never directly on your skin. The high acidity can irritate and damage your skin. Instead, try diluting a few drops of lemon juice in a tablespoon of water or honey and apply it to small areas for a few minutes before rinsing thoroughly. Always follow up with a moisturizer.

    The Soothing Magic of Aloe Vera:

    Aloe vera is a skincare superstar! Its anti-inflammatory and healing properties can soothe irritated skin, reduce redness, and promote even skin tone. Apply fresh aloe vera gel directly to your skin after cleaning, and let it absorb. It's a fantastic option for sensitive skin.

    The Exfoliating Power of Oats:

    Oatmeal isn't just for breakfast! Ground oatmeal can gently exfoliate your skin, removing dead skin cells that can make your complexion look dull. Mix a tablespoon of ground oatmeal with a little water or milk to create a paste, gently massage it onto your skin, and rinse thoroughly. This is a great option for weekly use.

    The Brightening Benefits of Turmeric:

    Turmeric, known for its anti-inflammatory and antioxidant properties, can help brighten your skin. Mix a teaspoon of turmeric powder with a little milk or yogurt to make a paste, apply it to your face, and leave it on for 15-20 minutes before rinsing. Note: turmeric can stain, so be careful and test a small patch first.

    The Hydrating Goodness of Honey:

    Honey is a natural humectant, meaning it draws moisture to your skin. This can help improve skin hydration and give you a healthier glow. Apply raw honey to your face, leave it on for 15-20 minutes, and then rinse. It's also great as a spot treatment for minor blemishes.

    Beyond Remedies: Healthy Habits for Radiant Skin

    Remember, what you put *into* your body affects your skin just as much as what you put *on* it. Here are some lifestyle changes that can contribute to brighter, healthier skin:

    • Drink plenty of water: Hydration is key for plump, healthy skin.
    • Eat a balanced diet: Fruits, vegetables, and whole grains provide essential vitamins and antioxidants.
    • Get enough sleep: Sleep deprivation can lead to dull, tired-looking skin.
    • Manage stress: Stress can trigger breakouts and other skin problems.
    • Exercise regularly: Exercise improves circulation, bringing oxygen and nutrients to your skin.

    Important Considerations for Teens

    Teenage skin is particularly sensitive and prone to breakouts. Be patient and gentle with your skin. Avoid harsh scrubbing or abrasive products. If you have persistent acne or other skin concerns, it's crucial to see a dermatologist. They can provide personalized advice and treatment plans.

    Don't fall for quick fixes or miracle products that promise dramatic results. Healthy, radiant skin is a marathon, not a sprint. Consistency and patience are your best allies.

    Also, remember that everyone's skin is unique. What works wonders for one person might not work for another. Be prepared to experiment with different methods and products to find what suits your skin best. And always, always, patch test new products on a small area before applying them to your entire face.

    Commonly Asked Questions (FAQs)

    Q: How long does it take to see results from these home remedies?

    A: It varies depending on the individual and the remedy. You may see some improvement within a few weeks, but significant changes usually take several weeks or even months of consistent use.

    Q: Can I mix different remedies together?

    A: It’s generally best to avoid mixing multiple remedies at once, as some ingredients may react negatively with each other. It's best to stick with one or two at a time and see how your skin reacts.

    Q: What if I have acne? Should I still use these remedies?

    A: If you have acne, some of these remedies might help, but it's essential to approach them cautiously. For example, turmeric's anti-inflammatory properties can be beneficial, but it might also clog pores. Always patch test and if your acne persists or worsens, consult a dermatologist.

    Q: Are these treatments safe for all skin types?

    A: While generally gentle, these remedies may not be suitable for all skin types. Those with sensitive skin should proceed with caution and perform a patch test before applying anything to their entire face. If you experience irritation, discontinue use immediately.

    Q: Will these remedies completely change my skin tone?

    A: No. These are designed to enhance your natural skin tone, promoting an even complexion and a healthy glow. They won't drastically lighten your skin.

    Remember, embracing your natural beauty is key! These home remedies can help you achieve a brighter, healthier complexion, but remember to always prioritize gentle care and listen to your skin’s needs. If you have any serious concerns, consult a dermatologist for personalized guidance. Happy glowing!
    Read More..

    How to prepare a DIY serum for skin brightening at home

    Crafting a DIY Skin-Brightening Serum: A Comprehensive Guide

    The pursuit of radiant, even-toned skin is a timeless endeavor. While numerous commercial skin brightening serums exist, many individuals seek natural alternatives. Crafting a DIY skin-brightening serum allows for precise control over ingredients, catering to specific skin needs and sensitivities. This guide provides a detailed explanation of formulating such a serum, emphasizing safety, efficacy, and proper application.

    Understanding Skin Brightening Mechanisms

    Before embarking on serum creation, understanding the mechanisms behind skin brightening is crucial. Hyperpigmentation, the underlying cause of uneven skin tone, arises from an overproduction of melanin, the pigment responsible for skin color. Several factors contribute to this, including sun exposure, hormonal fluctuations, inflammation, and genetic predisposition. Effective skin brightening serums target these mechanisms through a combination of approaches:

    Inhibition of Melanin Production:

    Many effective brightening agents work by inhibiting tyrosinase, the enzyme responsible for melanin synthesis. This reduces the amount of melanin produced, leading to a gradual lightening of dark spots and an improvement in overall skin tone. Examples include naturally derived compounds like vitamin C, niacinamide, and arbutin.

    Exfoliation:

    Gentle exfoliation helps to remove the outermost layer of skin cells, which contain accumulated melanin. This process reveals brighter, underlying skin. Alpha-hydroxy acids (AHAs) like lactic acid and glycolic acid are commonly used in commercial products for this purpose. However, DIY formulations should use AHAs cautiously, due to potential for irritation.

    Anti-Inflammatory Action:

    Inflammation can exacerbate hyperpigmentation. Therefore, incorporating anti-inflammatory ingredients can help reduce redness and promote even skin tone. Ingredients like aloe vera, green tea extract, and chamomile possess these properties.

    Selecting Ingredients for Your DIY Serum

    The effectiveness and safety of your DIY serum hinge on the careful selection of ingredients. The following provides a guide to some popular and effective choices, along with considerations for their use:

    Vitamin C (L-Ascorbic Acid):

    A potent antioxidant and tyrosinase inhibitor. Choose a high-quality, pharmaceutical-grade L-Ascorbic acid powder for optimal results. Remember that Vitamin C is highly unstable and prone to oxidation, so store it properly in a cool, dark place and use a preservative (see below).

    Niacinamide (Vitamin B3):

    Reduces melanin transfer and improves skin barrier function. Relatively stable, but still benefit from storage in a cool, dark place. It's generally well-tolerated by most skin types.

    Alpha-Arbutin:

    A natural tyrosinase inhibitor derived from bearberry leaves. Considered gentler than hydroquinone, another tyrosinase inhibitor, but can still cause irritation in some individuals. Start with a low concentration and monitor for any adverse reactions.

    Hyaluronic Acid:

    A humectant that draws moisture into the skin, improving hydration and plumpness. This ingredient enhances the overall texture and appearance of the skin, making it appear more radiant.

    Aloe Vera Gel:

    Soothes irritation and possesses anti-inflammatory properties. Use pure aloe vera gel, not products containing added fragrances or preservatives.

    Formulating Your DIY Serum

    The following recipe provides a basic framework. Adjust the concentrations according to your skin type and tolerance. Always conduct a patch test before applying to your entire face to check for any allergic reactions.

    Recipe: Basic Skin-Brightening Serum

    • 1 gram L-Ascorbic Acid (Vitamin C) powder
    • 1 gram Niacinamide powder
    • 0.5 grams Alpha-Arbutin powder
    • 10 grams Hyaluronic Acid (2% solution)
    • 10 grams Aloe Vera Gel
    • 1-2 grams Preservative (e.g., Optiphen BD, Phenonip, or other suitable preservative â€" consult a cosmetic chemist for guidance)

    Procedure:

    1. In a clean, sterile container, combine the hyaluronic acid and aloe vera gel. Thoroughly mix using a spatula or a clean stirrer.
    2. In a separate container, carefully mix the Vitamin C, Niacinamide, and Alpha-Arbutin powders. Ensure no lumps remain.
    3. Slowly add the powder mixture to the gel mixture, stirring gently and continuously to avoid clumping.
    4. Once fully incorporated, add the preservative, ensuring thorough mixing.
    5. Transfer the serum to a dark glass dropper bottle for storage.

    Important Considerations and Safety Precautions

    Creating a DIY serum necessitates careful attention to safety and hygiene:

    Sterility:

    Maintain a sterile environment throughout the process. Use sanitized equipment and containers. Proper sterilization techniques are essential to prevent microbial contamination, which can lead to skin infections.

    Preservation:

    Because natural ingredients are prone to microbial growth, the inclusion of a suitable preservative is essential. Improper preservation can lead to bacterial contamination and skin irritation. Consult a cosmetic chemist for guidance on selecting and using a safe and effective preservative. The concentration of the preservative will need to be determined based on the formulation and shelf life requirements.

    Patch Testing:

    Before applying any new skincare product to your entire face, perform a patch test on a small area of skin (e.g., inner arm) to check for any allergic reactions or irritations. Wait 24-48 hours to observe any adverse effects before proceeding with full facial application.

    Sun Protection:

    Many skin brightening ingredients increase skin sensitivity to the sun. Always use a broad-spectrum sunscreen with an SPF of 30 or higher during the day, even on cloudy days. This is crucial to prevent further hyperpigmentation.

    Gradual Introduction:

    Start with a low concentration of the serum and gradually increase it over time as your skin tolerates it. This minimizes the risk of irritation and allows your skin to adjust to the new ingredients.

    Professional Consultation:

    For individuals with sensitive skin or existing skin conditions, seeking advice from a dermatologist or cosmetic chemist is highly recommended before embarking on DIY serum creation.

    By following these guidelines, you can create a safe and effective DIY skin-brightening serum tailored to your specific needs. Remember that consistency is key, and results typically appear gradually over several weeks or months. Patience and adherence to proper usage are paramount for achieving optimal results.

    Read More..

    Homemade skin whitening treatments with natural ingredients

    Unlock Your Radiance: Homemade Skin Whitening Treatments

    Hey everyone! So, you're looking for ways to brighten your complexion naturally? You've come to the right place! We all crave that healthy, radiant glow, and while expensive products promise the moon, sometimes the simplest, most effective solutions are right in our kitchens. This isn't about drastic whitening, but about achieving a more even skin tone and reducing the appearance of hyperpigmentation â€" those pesky dark spots and uneven patches. Let’s dive into some amazing homemade skin whitening treatments using natural ingredients! Remember, consistency is key, so be patient and kind to your skin.

    Understanding Your Skin

    Before we jump into recipes, let's chat about your skin type. What works wonders for one person might irritate another. Knowing your skin type â€" oily, dry, combination, or sensitive â€" is crucial for choosing the right ingredients and avoiding any unwanted reactions. If you're unsure, a quick online search or a chat with a dermatologist can help you figure it out. And remember, always do a patch test on a small area of skin before applying anything new to your entire face. This helps prevent any allergic reactions or irritations.

    Top Natural Ingredients for Brighter Skin

    Nature's got a treasure trove of ingredients perfect for brightening your complexion. Here are some of the superstars:

    Lemon Juice

    Lemon juice is a classic for a reason! It's rich in Vitamin C, a potent antioxidant that helps fight free radical damage and evens out skin tone. However, lemon juice can be quite acidic, so dilute it well â€" a 1:1 ratio with water is a good starting point. And always avoid direct sunlight after applying lemon juice, as it can increase sun sensitivity.

    Turmeric

    Turmeric, the golden spice, boasts anti-inflammatory and antioxidant properties. It's known to reduce hyperpigmentation and brighten skin. However, turmeric can stain, so be mindful when applying it and wash it off thoroughly.

    Yogurt

    Yogurt, particularly plain yogurt, is packed with lactic acid, a gentle alpha-hydroxy acid (AHA) that exfoliates the skin, removing dead skin cells and revealing brighter skin underneath. Its cooling properties make it soothing for irritated skin too.

    Honey

    Honey is a natural humectant, meaning it attracts and retains moisture. It also has antibacterial and anti-inflammatory properties, which can help soothe and heal skin while promoting a healthy glow.

    Aloe Vera

    Aloe vera is a miracle worker! Its soothing and healing properties are perfect for calming irritated skin, reducing redness, and promoting a more even skin tone. It also helps to hydrate and improve skin texture.

    Gram Flour (Besan)

    Gram flour (Besan) is a common ingredient in many Indian beauty recipes. It gently exfoliates, absorbs excess oil, and helps lighten the skin tone. It's particularly good for oily skin.

    DIY Skin Whitening Treatments

    Now for the fun part â€" let's create some amazing homemade skin whitening treatments! Remember to always do a patch test before applying any of these to your entire face.

    Lemon and Honey Mask

    Mix equal parts of diluted lemon juice (1:1 with water) and honey. Apply to your face, leave on for 15-20 minutes, and rinse thoroughly with lukewarm water. This mask is great for brightening and hydrating your skin.

    Turmeric and Yogurt Mask

    Combine 1 tablespoon of turmeric powder with 2 tablespoons of plain yogurt. Apply to your face, leave on for 15-20 minutes, and rinse thoroughly. This mask helps to brighten and even out skin tone while soothing inflammation.

    Aloe Vera and Honey Gel

    Mix fresh aloe vera gel with a teaspoon of honey. Apply to your face, leave on for 15-20 minutes, and rinse with cool water. This soothing gel is perfect for calming irritated skin and promoting a healthy glow.

    Gram Flour and Yogurt Scrub

    Combine 2 tablespoons of gram flour with enough plain yogurt to create a paste. Gently massage this scrub onto your face in circular motions for a few minutes, then rinse thoroughly. This scrub gently exfoliates and brightens your skin.

    Simple Yogurt Mask

    Simply apply a layer of plain yogurt to your face. Leave it on for 15-20 minutes, then rinse it off. This simple mask offers gentle exfoliation and hydration.

    Important Reminders

    Before you begin, let's reiterate some key points:

    • Patch test: Always test a small area of skin before applying any new treatment to your entire face.
    • Consistency: Results take time. Be patient and use your chosen treatment regularly for best results.
    • Sun protection: Many natural skin-brightening ingredients increase your skin's sensitivity to the sun. Always use sunscreen with an SPF of 30 or higher, especially after using these treatments.
    • Listen to your skin: If you experience any irritation, redness, or burning, stop using the treatment immediately and consult a dermatologist.
    • Realistic expectations: These treatments are designed to improve your skin's overall tone and radiance. They are not magic wands and won't drastically change your skin color.

    Frequently Asked Questions

    Q: How often should I use these treatments?

    A: It depends on your skin type and the specific treatment. Start with 1-2 times a week and adjust based on your skin's reaction. If your skin feels irritated, reduce the frequency.

    Q: Will these treatments work for all skin types?

    A: While these ingredients are generally safe and gentle, it’s crucial to do a patch test and monitor your skin's reaction. Some ingredients might not be suitable for very sensitive skin. If you have any concerns, consult a dermatologist.

    Q: How long will it take to see results?

    A: You may notice some improvement within a few weeks of consistent use, but significant changes usually take several weeks or even months. Be patient and consistent!

    Q: Can I use these treatments along with other skincare products?

    A: It's generally best to keep your routine simple. Use these treatments as standalone treatments, rather than layering them with other products, especially exfoliants, which could irritate your skin.

    Q: What if I have a specific skin condition like acne or eczema?

    A: If you have any skin condition, it's best to consult a dermatologist before trying any new treatment, including natural ones. They can assess your skin and recommend the most appropriate course of action.

    Remember, healthy, glowing skin starts from within! Drink plenty of water, eat a balanced diet, and get enough sleep. These homemade treatments are just a little extra boost to help you reveal your natural radiance. Good luck and have fun experimenting!

    Read More..

    Traditional skin whitening methods for brides

    Unveiling the Secrets: Traditional Skin Whitening Practices for Brides

    For centuries, brides across various cultures have sought ways to enhance their complexion, often aiming for a lighter skin tone. These practices, passed down through generations, reflect deeply ingrained cultural beliefs and offer a fascinating glimpse into beauty rituals of the past. While many modern brides opt for clinically proven methods, understanding the historical context of these traditional techniques provides a rich perspective on beauty standards and the enduring quest for radiant skin.

    The Allure of Lighter Skin: Cultural Influences

    The preference for lighter skin is rooted in complex social and historical factors. In many parts of the world, lighter skin has been associated with higher social status, wealth, and even purity. This association, often stemming from colonial influences and historical power dynamics, has deeply impacted beauty ideals, leading many brides to actively pursue skin lightening as part of their wedding preparations. The pressure to conform to these ideals, however, is increasingly being challenged as modern perspectives on beauty diversity emerge.

    South Asian Traditions: A Blend of Herbs and Practices

    In South Asia, numerous traditional methods have been employed for skin lightening. Ubtans, natural pastes made from ingredients like turmeric, sandalwood, gram flour, and milk, are frequently used. Turmeric, known for its anti-inflammatory properties, helps soothe skin and even out tone. Sandalwood, with its cooling effect, reduces redness and inflammation. Gram flour acts as a gentle exfoliant, removing dead skin cells to reveal brighter skin. These ingredients, often combined with milk or yogurt for moisture, are applied to the skin regularly in the weeks leading up to the wedding. This practice not only aims to lighten the skin but also to improve overall texture and radiance.

    East Asian Practices: The Significance of Pearl Powder

    East Asian traditions also offer unique approaches to skin whitening. Pearl powder, for centuries a prized ingredient, features prominently in many beauty recipes. Ground into a fine powder, pearls were believed to possess brightening and moisturizing properties, contributing to a flawless complexion. Combined with other ingredients like rice flour and honey, pearl powder was used in face masks and creams, applied regularly to achieve a desired level of skin lightening. The delicate nature of these ingredients reflects the careful attention paid to the skin's health and the desire for a gentle, natural approach to whitening.

    Modern Considerations: Safety and Ethical Implications

    While these traditional methods often use natural ingredients, it is crucial to approach them with caution. Some ingredients, if improperly used or if an individual has sensitive skin, might cause irritation or allergic reactions. Furthermore, the pursuit of skin lightening should be approached responsibly, prioritizing skin health and acknowledging the diverse beauty standards that exist today. It's always advisable to consult a dermatologist before using any skin lightening product, whether traditional or modern, to ensure safe and effective results. Ultimately, the healthiest and most beautiful skin is healthy and happy skin, regardless of its shade.

    Balancing Tradition and Modern Science

    Bridal beauty rituals are deeply interwoven with cultural heritage. While traditional methods offer a glimpse into the past, it's essential to balance historical practices with modern dermatological knowledge. This includes understanding the potential risks of certain ingredients, the importance of sun protection, and the acceptance of diverse beauty standards. Ultimately, celebrating one's unique skin tone and ensuring its health should always be paramount.

    Choosing a path that combines the beauty of tradition with the safety and informed choices of modern science ensures that the bride's journey towards her wedding day is one of confidence, health and radiant beauty.

    Read More..